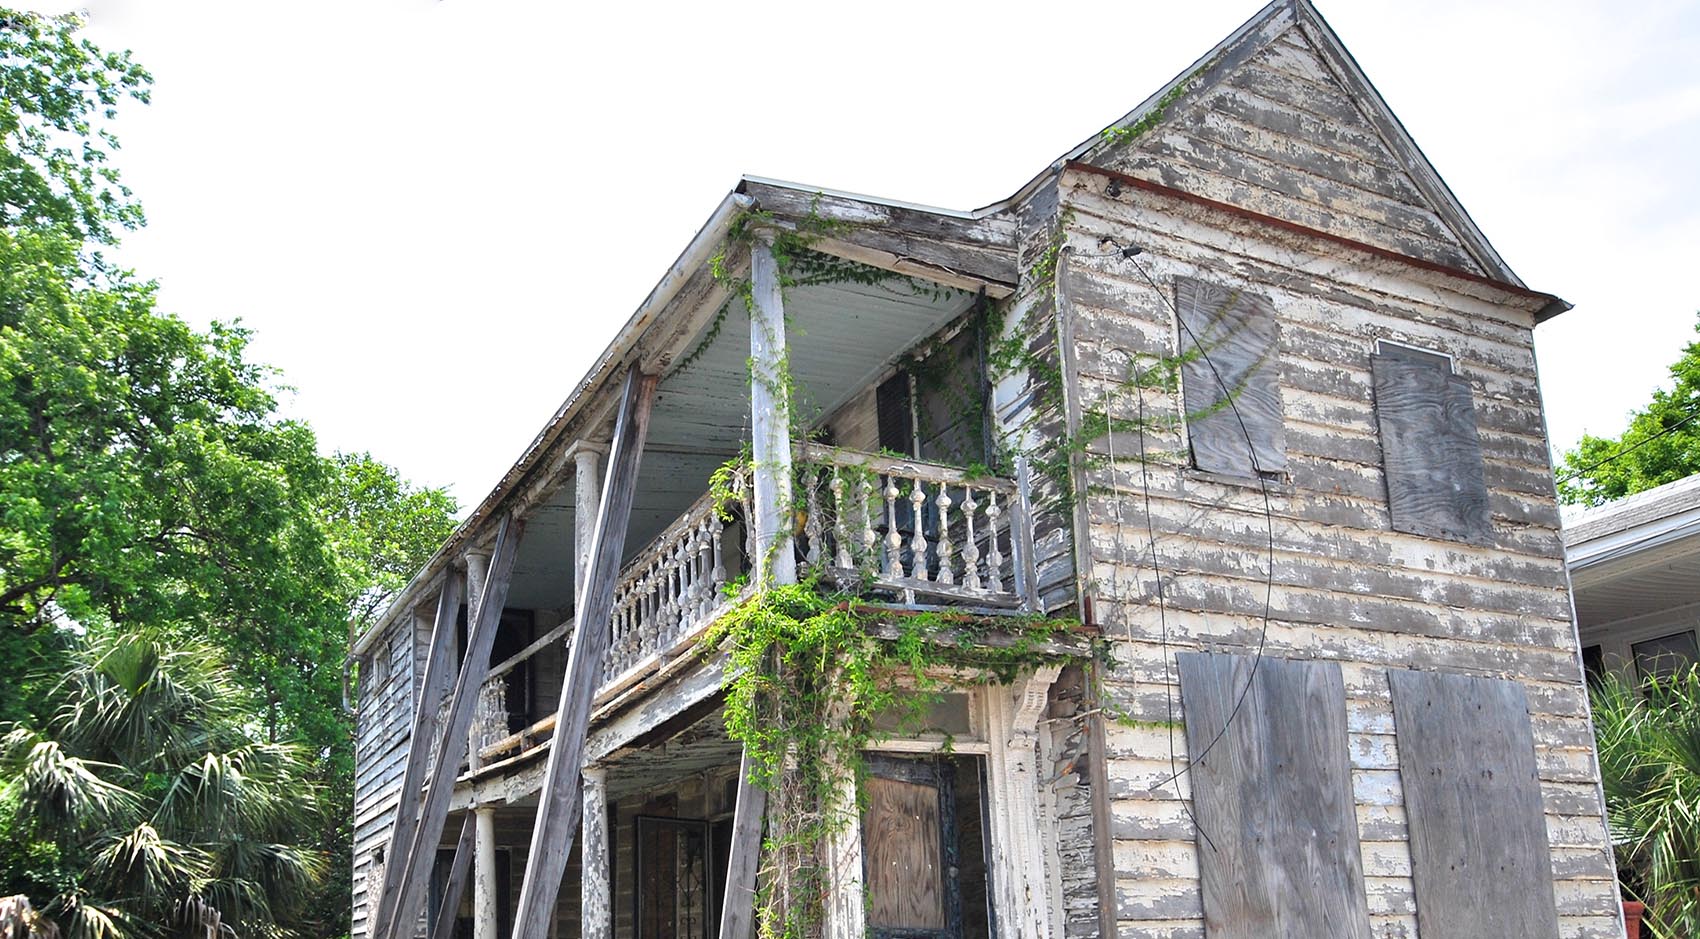
 A few weeks ago we posted a blog highlighting a renovation project on St Philip St. in downtown Charleston. That project is now underway, demolition has been completed and it was time to raise and level the old wooden home. It’s good advice that, if you are undertaking a major renovation, you should consider raising the home at least to Federal Emergency Management Agency (FEMA) Flood Level specification for its location. We are lifting 4 homes as I write, one on St Philip St. and 3 on Nassau St. This is the story of lifting St Philip.
Most homes are elevated in order to remove the first floor from the floodplain. This both limits potential damage from any future flood and simultaneously results in much cheaper flood insurance. Another reason to lift a home from its foundations is to level or otherwise straighten the home that has settled into the soft peninsular soil over its lifetime. Typically this settlement is concentrated around the heavy structure of the chimney, and in that respect, 269 St Philip was no different.
The large chimney structure contained one cooking fireplace and two for the accommodation. At some time in the past, the top had been removed and the roof covered over. As it was no longer externally visible we were able to remove and reclaim all the bricks down to grade level. We also requested a structural report on the footings as part of the planning process.
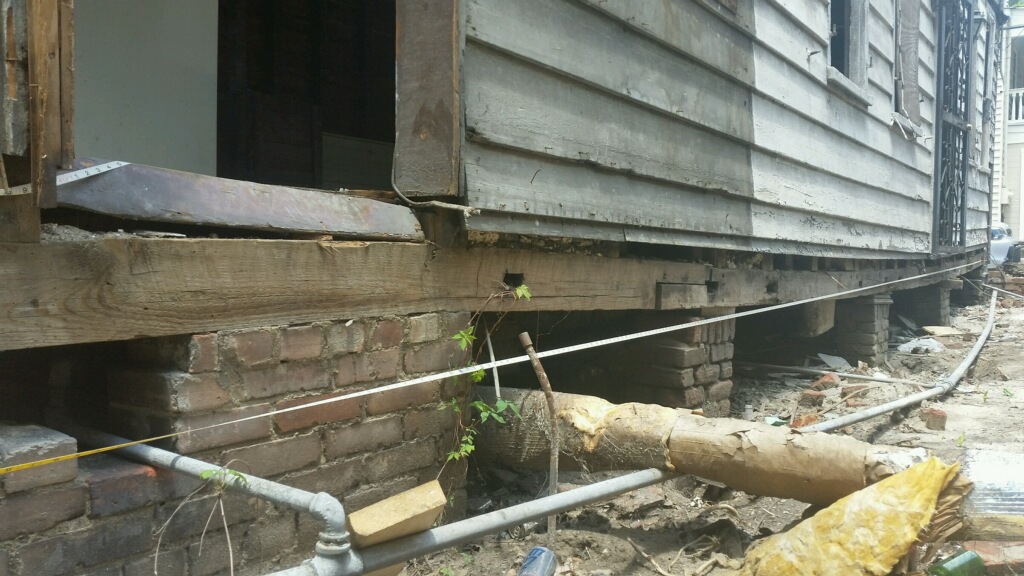
It is typical to remove and replace old footings, especially where the home is being elevated. Our requirement was only to achieve a level home and remove a pronounced sag in way of the old chimney. A structural report revealed the rear footings to be in good order being newer than the remainder. The side footings of the piazza had sunk around 8 inches but were otherwise sound. The opposite side of the home and street frontage were also sound. So the plan was to stabilize the spot footings in way of the piazza and to, wherever possible, level the remainder. This saved about 10% of the renovation budget in comparison to grubbing them out and replacing. The home was in a FEMA Flood “X ” Zone so did not need further elevation per se.
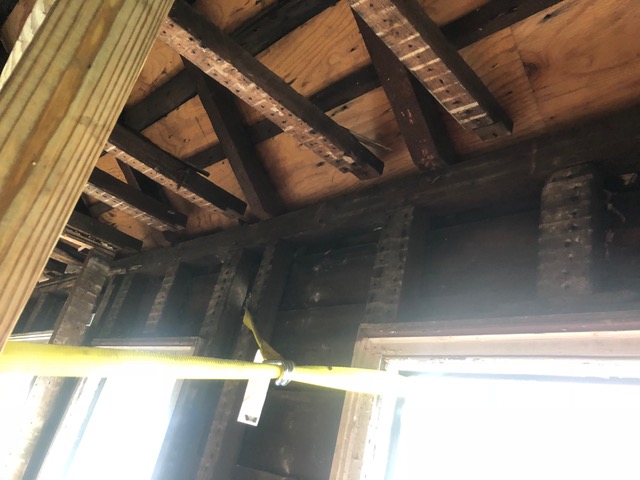
The first act was to demolish any structure that would need extensive repair. Once the home was stripped bare we had a much better view of its structure. The balloon frame was basically sound except for the rear wall which had seen considerable termite infestation and would need replacing.
Looking at the home it seemed the grade level fell away towards the rear. A laser level survey revealed the opposite in that the home had settled towards the street frontage. An eye will tend to assume a building is horizontal rather than the grade, so always use a laser as the final arbiter. Side spot footings were stabilized with auger foundations that are driven 25 feet into the grade. The first-floor level was braced internally to prevent the house from “racking ” sideways and we prepared to lift the old building off its footings. Then we checked the weather forecast – best not to elevate a home with a storm coming in!
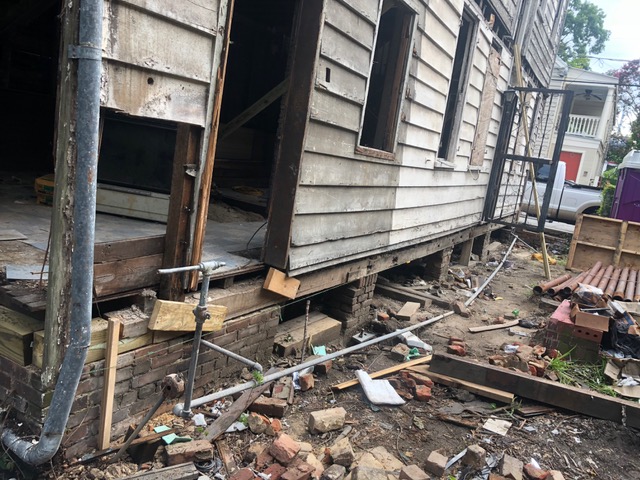
Lifting directly on to wooden timbers is frankly dangerous. They can collapse from unseen rot and damage or on occasion shatter under the intense pressure forces. So all jacking points were against substantial steel angle irons set against the original rim beam. The home was elevated about 6 inches all around allowing us to replace any rotted timbers and level the footings by removing two brick courses on the rear footing and packing where necessary. Then, that same afternoon, the home was lowered. A check with the laser level and we were within 1/2 inch all around which is very acceptable and probably better than this house has seen in 100 years.
Packing up our tools for the day then – CRACK!! – a staccato CRACK like a rifle shot. Well, the house does need to square up all those timbers that had moved over the years so no real concern. 10 minutes later – CRACK then THUD. Oh dear, this is not normal (I edited that from the raw Anglo Saxon). So down tools and go into the building to investigate. CRACK, its time for hard hats. The CRACK noise was the second-floor ceiling beams at the front of the house separating from the piazza side wall. The THUD was them falling to the floor. This is not great and certainly not expected. The roof was spreading outwards and forcing the side wall of the house away from the vertical. At some point, it would partially collapse. In such a situation you basically have two choices, run and let nature take its course or brace it quickly. We took the latter route, braced like a team possessed, strapped the side wall to the bracing to prevent its further movement and then externally as added support. 30 long minutes for two teams of two. Once stabilized the movement stopped and we secured the site until the morning. Further racking and a few bottle screws and the walls were again upright, this time secured solidly using modern construction brackets as opposed to 150-year-old failing wooden pins.
It’s tempting to always report success and gloss over problems. In truth, that is when we learn our best lessons. We learned that our teams could be trusted in a rough situation and especially that the house moving specialist we worked with was a calm and experienced professional. We considered the cause which was probably the final act of the house going level.
The roof had been replaced at some point and the sheeting fitted when the home had already sagged. As the house went level then the roof was effectively shorter than it needed to be and something had to give as wood does not stretch. “Hindsight is 20/20 vision, ” as they say.
So now our diamond in the rough is level. We have saved about 10% of the total construction budget and a month of construction work. The next two tasks are to complete spot foundations for a new piazza and to frame out the home. At the same time, we will begin construction of a home utilizing SIPS panel construction in the rear yard though that’s the subject of a future blog post.
Note: If you’d like to see how the site will look upon completion, you can download details here. See a few of our other projects and what our Simplified Construction team is capable of when it comes to new construction and renovations in Charleston SC…
Interested in Learning More?
Our expert teams - from development, investment, real estate, and property management - have experienced it all and have the insight to help you along the way.
Find Out More